GR-2000 Grinder


Description of the product
Automatic grinding device GR-2000 was designed in order to improve the efficiency of the process of longitudinal grinding of samples subjected to strength testing.
The kinematics of the device enables grinding flat and cylindrical samples using a wide range of grades of grinding paper.
The grinding module has exchangeable clamping inserts of different shapes and hardness. This ensures precise guidance of the abrasive surface over the sample profile while maintaining the preset clamping force.
CONTROL
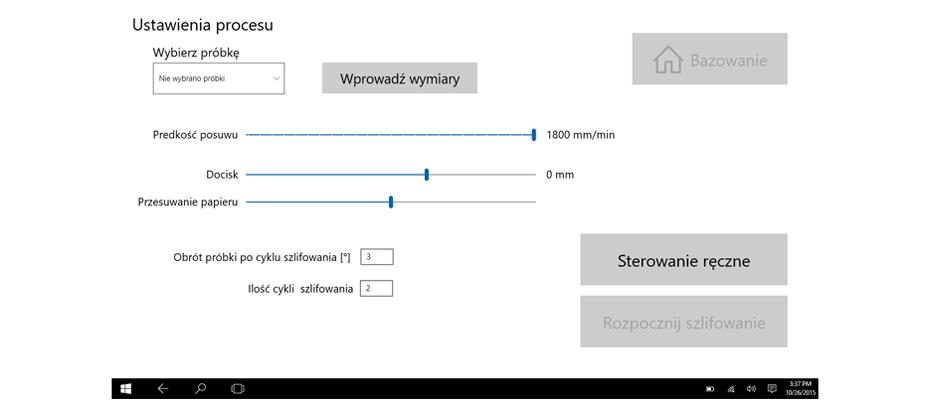
The application enables quick entering of the grinding process parameters using a 13” touch screen.
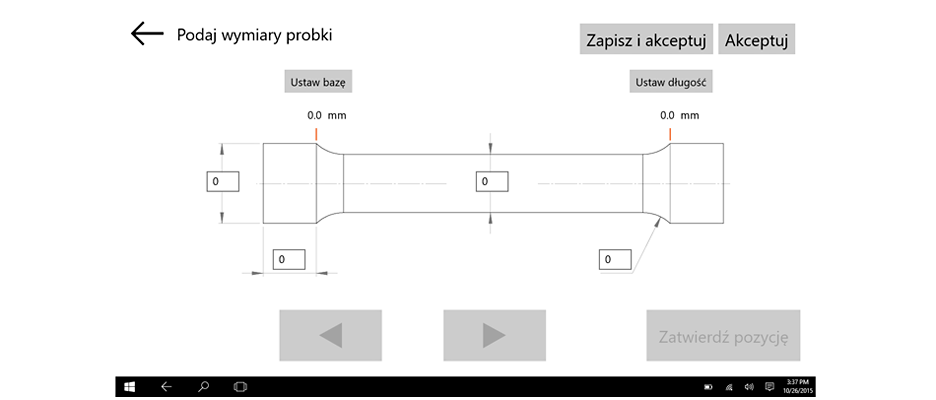
The geometry of the sample is defined intuitively using a laser marker. The operator enters the clamping force value for the grinding element, rotation angle of the sample and grinding speed.
The progress of the process is displayed in real time and provides the user with information on the time of completion.


Advantages of the system
- high dynamics of the grinding process
- intuitive application with touch user interface
- precise matching of the grinding path to the material sample
- control over the force clamping the grinding element
- exchangeable abrasives of varied grades
- wide choice of geometries and hardness grades of the clamping element
- quick and easy mounting of the sample in the machine
- high repeatability of the grinding parameters
TECHNICAL PARAMETERS
| Maximum speed (X-axis) | 0,5 m/s |
| Maximum speed (Y-axis) | 0,4 m/s |
| Clamping force in the range | 0-50N |
| Sample rotation resolution | 0,1o |
| Supply voltage | 230VAC |
| Power | 1,5kW |
| Weight | 120kg |
| Diameter range | 5-25mm |
| Overall dimensions | 500x480x1200mm |
PERFORMANCE
Performance of the grinding device depends on the geometry of the sample and the parameters of grinding.
A single grinding of a material sample with a diameter of 12 mm, length of 120 mm with standard settings of the grinding parameters takes approx. 3 min.
Frequently asked questions
Q: Round bars: Automatic polishing device controls polishing so that contact between the specimen and a specific area on the abrasive is one stroke on the paper in the axial direction (i.e. use that area on the paper only once).
A: System allows to set a shift a sandpaper after each stroke – before starting a process you can choose a value of shift sandpaper from 0 to 10 mm with 1 mm step. So yes – one area of sand paper is using only once time (look at 1.10 minutes of our movie).
Q: Paper is backed during polishing with rubber 3/16 inch (4.8 mm) minimum thickness: applied contact force – 6 lbs (2.7 kg) maximum.
A: We provide a sets of rubber pushers (dimension – 10×8 mm). There are made from different types of rubber (30-60-90 in Shore hardness scale). This solution allows you control a shape of contact area in depends on setting force and choosen hardness of pusher. The contact force is set before starting process (in the application) and can be choose between 0 and 5 kg (with 0,1 kg step).
Q: Polishing is controlled so that contact between the specimen and a particular area on the paper occurs only once and polishing is axial.
A: Exactly as it is in our device.
Q: Circumferential grinding marks are removed with 180 – 240 (or finer) grit paper before proceeding with finer grit.
A: Responsible for selection grit of sandpaper was Institute of Aviation in Poland. We know, that they started a process from 800 grit. After 2 full turns of sample and axial polishing every 3 degrees the circumferential scratches were removed. In next steps they used a 1000 and 1200 grit. We think that the finally amount of strokes and sandpaper grit depends on a lot of factors (i.a. surface roughness after lathing process).
Q: Final polished surface finish is 8 to 12Ra μinches (0.2 – 0.3 μm). It is possible?
A: Yes, that is possible, the final surface roughness depends on a few variables. A key is a proper sandpaper. Finally with the polisher we provide a material SA331 type from Deerfos company (800, 1000 and 1200 grit) – tests have shown that it is the best choose.
www.deerfos.com